Introduction: Why Calibration Matters for Endoscopy Cameras
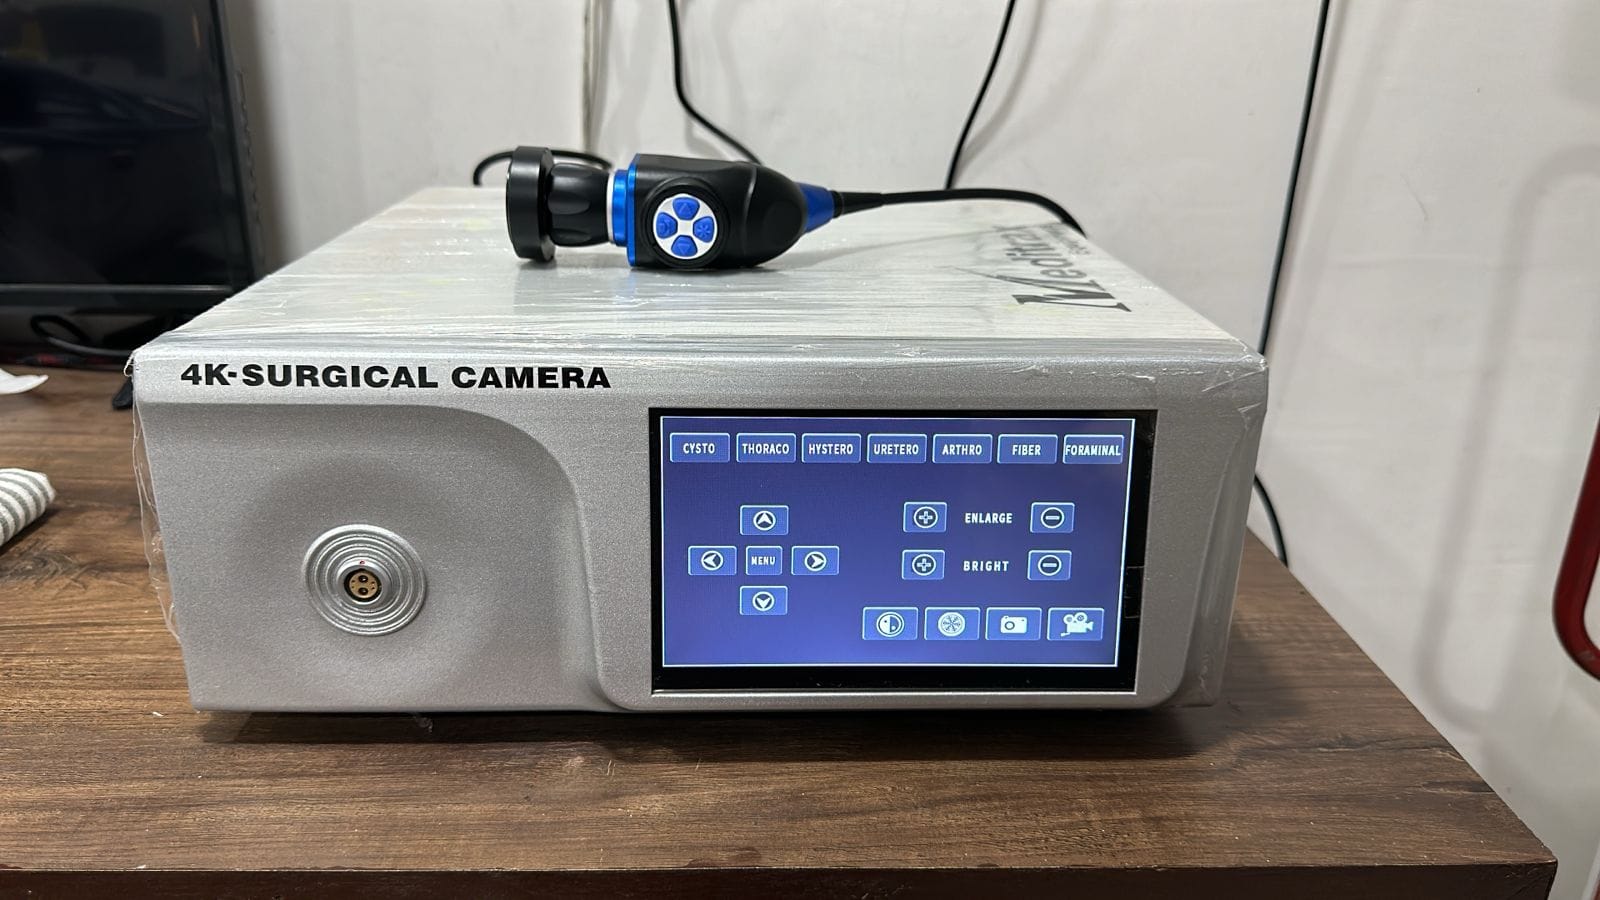
Endoscopy cameras are essential tools in medical diagnostics, allowing healthcare professionals to view and analyze internal organs with precision. The quality of the images captured by these cameras is critical to making accurate diagnoses, identifying abnormalities, and guiding treatment procedures. To ensure that your endoscopy camera consistently provides clear and accurate visuals, regular calibration is necessary.
Proper calibration adjusts the camera settings and ensures that the camera’s sensor, lens, and software work together seamlessly. It minimizes distortions, color inaccuracies, and other issues that may compromise the clarity and detail of the images. EndoscopCam‘s guide will walk you through the process of calibrating your endoscopy camera for optimal results.
Understanding Endoscopy Camera Calibration
What is Camera Calibration?
Calibration is the process of adjusting and configuring your camera’s settings to achieve the highest possible image quality. In the case of endoscopy cameras, calibration involves fine-tuning several parameters, such as focus, resolution, color accuracy, and contrast. Proper calibration ensures that the images captured are accurate representations of the internal structures being examined.
The Importance of Calibration
Endoscopy cameras are used in various medical procedures, such as gastrointestinal endoscopy, laparoscopy, and arthroscopy, among others. Any inaccuracies in the images could lead to misdiagnosis, ineffective treatment, or patient discomfort. By calibrating your camera regularly, you can ensure that the images you capture are crisp, detailed, and true to life.
Step-by-Step Guide to Calibrate Your Endoscopy Camera
Step 1: Prepare Your Equipment
Before you begin calibrating your endoscopy camera, it’s essential to gather all the necessary equipment and ensure that your camera system is set up correctly. Here’s what you need to do:
H3: Gather the Necessary Tools
- Endoscopy camera system
- Calibration tool or calibration chart (usually provided by the camera manufacturer)
- Light source or light source calibration tool
- Clean lens wipes or cloth
- Monitor or screen for displaying the images
- Camera manual or calibration instructions
H3: Ensure Proper Camera Setup
- Make sure the camera is securely connected to the video processor and the monitor.
- Ensure that the camera lens is clean and free of any debris or smudges.
- Turn on the camera system and adjust the focus ring if necessary.
Step 2: Calibrate the Focus
The clarity of your images relies heavily on the proper focus. An out-of-focus camera can result in blurry or indistinct images, which can affect the quality of your diagnosis.
H3: Adjust the Focus Ring
- Locate the focus ring on the endoscope’s camera head.
- Use the calibration chart or tool to align the camera’s focus. The chart should have fine details and grids that help you determine when the image is sharpest.
- Adjust the focus ring gradually while monitoring the image on the screen, ensuring that the image becomes as sharp as possible.
H3: Check for Optimal Focus
- After adjusting the focus, ensure the calibration chart appears sharp and clear with no blurring on any of the details.
- If the camera has a zoom function, ensure the image remains focused at all zoom levels.
Step 3: Calibrate the White Balance
The white balance setting ensures that the camera reproduces accurate colors, especially in varying lighting conditions. An incorrect white balance can lead to unnatural colors and make it difficult to interpret the images correctly.
H3: Perform White Balance Calibration
- Place the camera in front of a neutral white or gray surface, ideally using a white calibration card or chart.
- Access the camera’s white balance settings through the camera menu or settings panel.
- Adjust the white balance controls (either manually or automatically) until the white surface appears true to color with no color casts.
H3: Test the Calibration
- After adjusting, verify that the colors appear natural on the screen. Check for any visible color distortions that may need further adjustment.
- It’s important to repeat this step under different lighting conditions to ensure consistent performance.
Step 4: Adjust the Brightness and Contrast
Proper brightness and contrast settings are vital for distinguishing details in the images. Too much brightness can wash out the details, while too little can make it difficult to see subtle features.
H3: Set the Brightness and Contrast
- Use the camera’s menu to access the brightness and contrast settings.
- Adjust the brightness to a level where the image is clear without overexposing highlights or causing excessive glare.
- Set the contrast to enhance the visibility of the internal structures, ensuring that dark areas don’t become too black and light areas are not too washed out.
H3: Test with Real-Time Imaging
- Test the settings by capturing a live image of a sample or calibration chart. Ensure that the details in the dark and light areas are visible and well-defined.
Step 5: Perform Resolution Calibration
High resolution is crucial for capturing fine details in medical diagnostics. Ensure your endoscopy camera is set to the highest resolution possible for accurate image capture.
H3: Check Camera Resolution Settings
- Access the resolution settings through the camera’s menu.
- Choose the highest available resolution that the system supports.
- If your camera has multiple resolution modes, select the one best suited for your diagnostic needs.
H3: Verify the Image Quality
- Capture test images and review them for clarity and fine details. Ensure the resolution is high enough to show small structures clearly without pixelation.
Step 6: Regular Maintenance and Calibration Checks
Endoscopy camera calibration is not a one-time task; regular maintenance and recalibration are necessary to maintain image quality over time.
H3: Schedule Regular Calibration
- Set up a routine to calibrate your endoscopy camera every few months or after any major usage.
- Keep track of the camera’s performance and recalibrate if you notice any changes in image quality.
H3: Clean and Maintain the Camera
- Regularly clean the lens and check for any signs of wear or damage.
- Ensure that cables, connectors, and other parts of the system are in good working condition.
Conclusion: Ensure Optimal Performance with Regular Calibration
Properly calibrating your endoscopy camera is essential for maintaining high-quality images, ensuring accurate diagnoses, and improving patient outcomes. By following the step-by-step guide above, you can ensure that your camera is always performing at its best. Regular calibration, along with consistent maintenance, will help you achieve optimal results and enhance the overall effectiveness of your endoscopic procedures.